
Custom dice are a satisfying project that combines laser work, design software, and a little painting finesse. Here’s how I made a set of 16 acrylic dice with laser-etched pips and hand-painted fills.
Design in Inkscape
Inkscape is a free vector drawing tool well-suited for laser work, since you can design both line cuts and area fills in the same file. For this project, almost everything is done with line cuts rather than fills. Line cuts are faster, and more importantly, they reduce the risk of melting acrylic — always a concern when the laser lingers too long in one spot.
Heavier lines are made by cutting multiple parallel lines close together, and any lettering or symbols are drawn in outline rather than filled solid. This keeps the graphics visible without the heat buildup of a full area fill.
One design detail worth thinking through: pip size. The pips on a 2-face can afford to be larger than those on a 6-face, where six images have to fit in the same space. Design each image individually so the pips read clearly without crowding, and a reasonably constant visual weight is achieved between faces.
Dialing In the Settings
Before etching your real dice, test your laser speed and power settings on scrap dice, then apply paint to the test pieces. This is the only reliable way to know if the etch depth is right. Too shallow and the paint won’t grip well; too deep and you’ll get air bubbles, heavier paint consumption, and a noticeably recessed finish. Find the middle ground where the paint fills cleanly and sits flush.
The Jig and Alignment
This is where the project gets precise. Unlike cutting a shape from sheet stock — where the laser’s Frame function is enough to confirm the image fits the workpiece — etching dice demands exact, repeatable alignment. I built a jig that holds a 4×4 grid of 16 dice at once, with two reference edges to push the dice firmly into the same position every time. The jig itself gets pushed into a corner of the laser bed.
To calibrate, I made a test pattern: an X and a + overlaid on each other. After running the pattern, I measured from the + to all four edges. Fine adjustments go through the Move tab in LightBurn rather than by shifting the jig or the arrow keys on the laser. The X serves as a corner accuracy check — if the diagonals look right, the alignment is right. Once everything is square, set the laser origin.
For each die face, import the image into LightBurn and align it to the test pattern using the alignment tools. Before you run the job, make sure the test pattern layer is deleted or disabled — it’s an easy thing to forget.
Painting the Fills
With the etching done, filling the pips is almost meditative. I used Testor’s enamel paint, applying it with a toothpick — flooding each etched area with small drops. Dab off most of the paint immediately on a lint-free cloth, then swirl the die face on a section of the cloth moistened with odorless mineral spirits. The solvent pulls the excess paint cleanly off the surface while leaving the etched areas filled.
The results speak for themselves — sharp pips, clean edges, and a finish that holds up well.
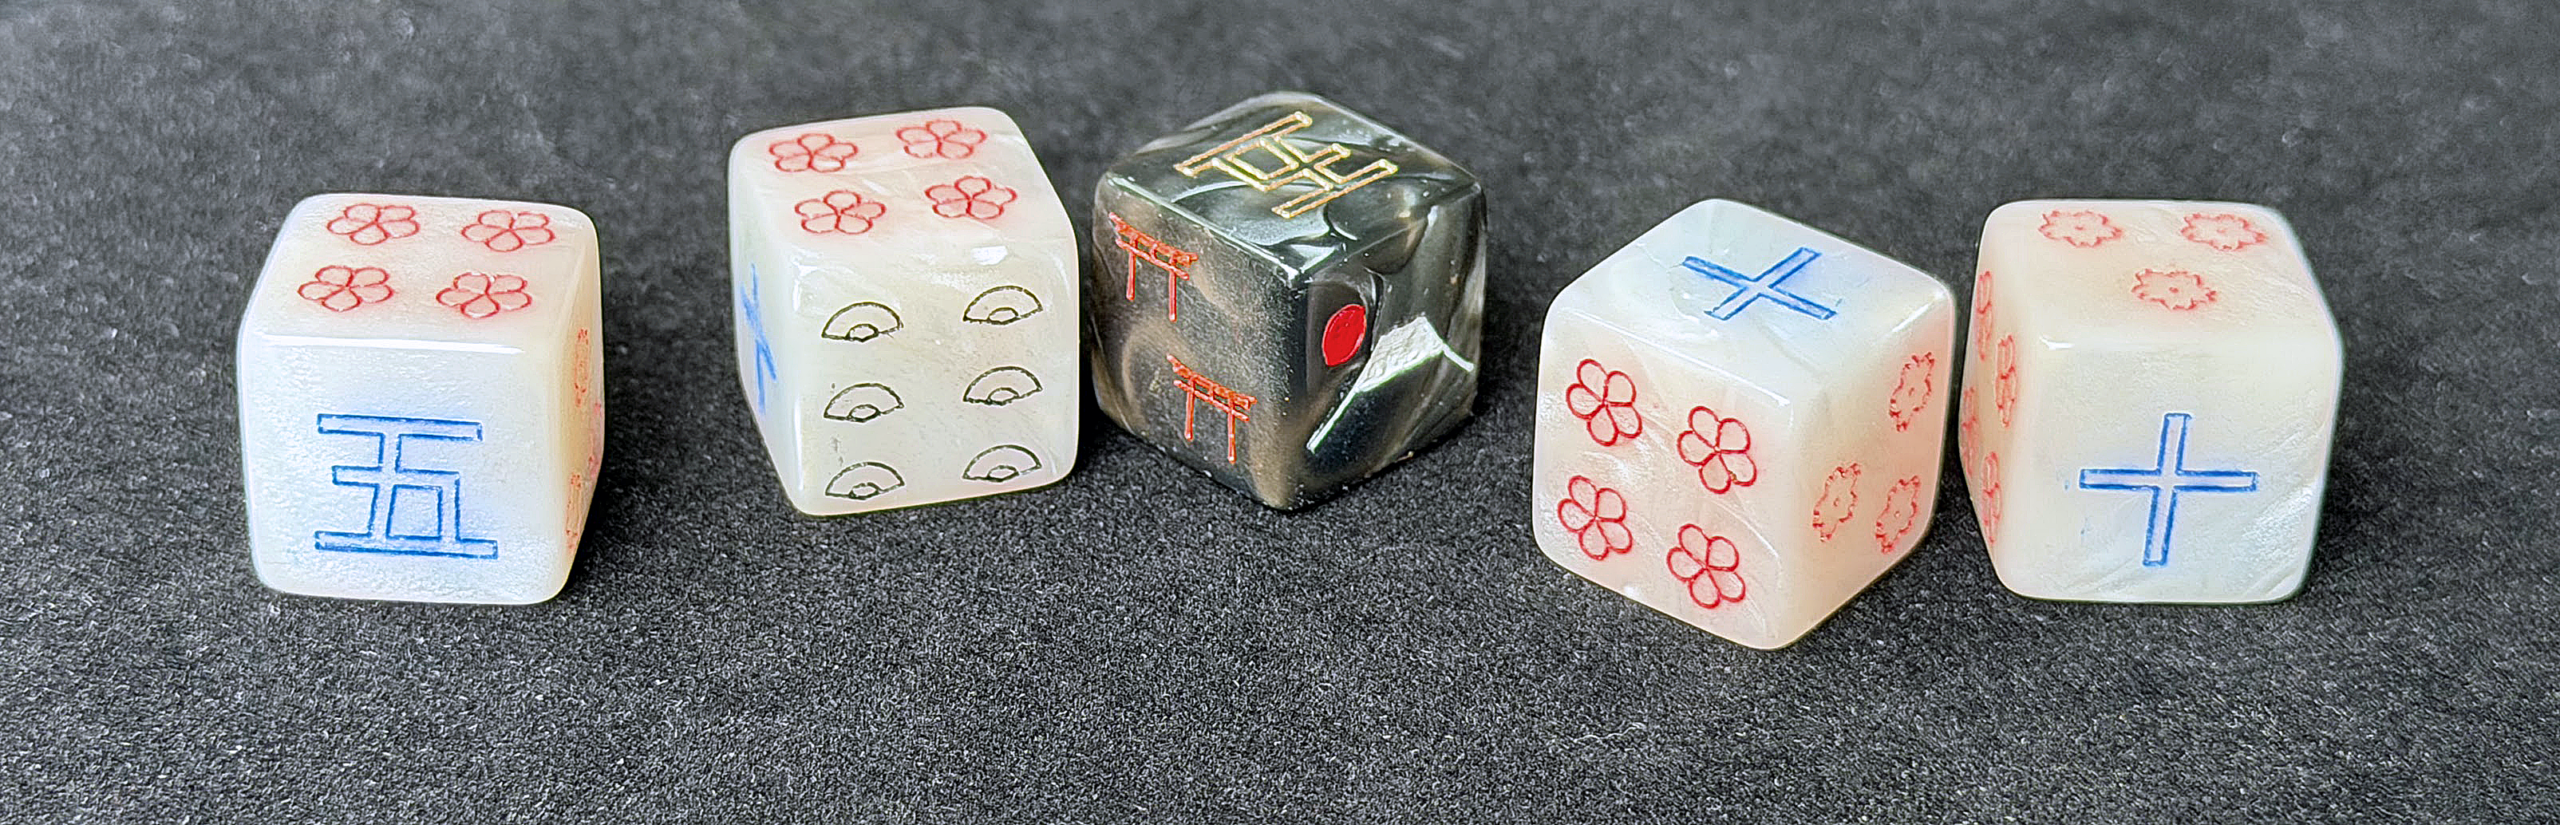
Five dice from the set, showing several face designs: cherry blossoms (3), plum blossoms (4), folding fans (6), torii gates (2) and kanji 5 and 10. The snow on Mt. Fuji and the red sun are the only elements created with area fills. Pips are laser-etched and hand-painted with enamel.